
Topic Contents Hide

The Settings panel is opened by tapping the Settings button on the left-hand slideout panel.
The Settings pane is split into sections. Each section is described below.
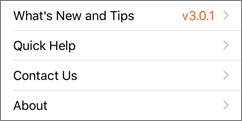
The Help pane on the Settings panel displays the current app Version number, along with some buttons allowing access to other features.
What's New and Tips
From the What's New and Tips panel, you can do the following:
Quick Help
Displays a list of the main buttons within the app, and a brief description of the function each performs.
Contact Us
Allows you to submit a support request to the Hema Tech Support system.
About
Displays the Terms & Conditions of Use of the application and Cloud, and Privacy Policy.
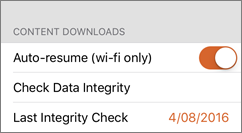
Auto-resume (wi-fi only)
Options [ON | OFF]
Determines whether the Hema Explorer app will automatically resume partially completed downloads. If set to YES, the downloads will only resume when connected to a WiFi network. This is to avoid incurring additional costs when accessing the internet via a mobile broadband connection.
Check Data Integrity
This will perform a data integrity check to ensure that downloaded data is in a sane state.
Last Integrity Check
Displays the date or time on which the last Integrity Check was performed.
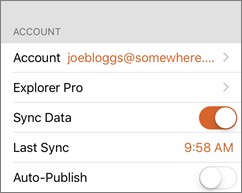
Account
User account used to sync data to the Cloud. Tap here to open the Account panel, where you can login, change the account used, change password, etc.
Explorer Pro
Allows you to purchase an Explorer Pro subscription or view the status of an existing subscription.
Sync Data
Options [ON / OFF]
Determines whether the Hema Explorer app will automatically sync saved data into the Hema Explorer Cloud. The Hema Explorer Cloud stores your data safely via your account.
Last Sync
Displays the date / time at which the last Cloud Sync was performed. Tapping this will perform a manual sync operation.
Auto-Publish
Options [OFF | ON]
When Auto-Publish is switched on, ALL tracks which you record, which sync to the Cloud, will also be made available for public view in the Gallery on the Hema Explorer Cloud. Be sure this is what you want before switching on this option.
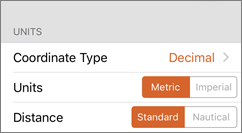
Coordinate Type
Options [Decimal Degrees | Degrees, Minutes, Seconds | Degrees, Decimal Minutes | UTM Coordinates | MGRS Coordinates]
Determines what type of coordinates to use throughout the app.
Tap the Coordinate Type button to go the Coordinate Type panel.
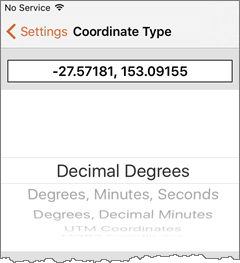
Choose your preferred option from the wheel in the lower part of the panel. You will see a preview of the format at the top of the panel.
Tap the Settings button at upper-left to return to the main Settings panel.
Units
Options [Metric | Imperial]
Determines the units of measure which are used for display within the app. This setting may change automatically depending on your devices regional settings.
Distance
Options [Standard | Nautical]
Determines the type of units which are used for display within the app.
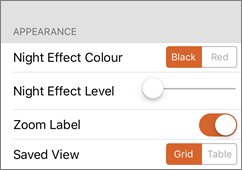
Night Effect Colour
Options [Black | Red]
Determines the colour mask which is used to produce the night dimming effect.
Night Effect Level
Determines the degree to which the night dimming effect is applied. The further the slider is moved to the right, the more pronounced the effect.
Zoom Label
Options [ON | OFF]
Determines whether or not the Zoom Level indicator is displayed on the map pane. When switched on, an indicator is displayed above the Map Scale indicator in the lower-left of the map pane as shown below.
Remember, tapping the map pane will zoom into the map in single zoom-level increments.

Saved View
Options [Grid | Table]
This option determines the view of your data in the My Data panel.
Examples of each view are shown below.
Grid view |
Table view |
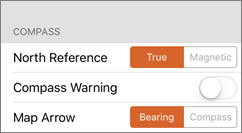
North Reference
Options [True | Magnetic]
Determines whether the pointer points to True or Magnetic North. Generally, if you are using compasses etc. it is better to have this set to Magnetic. For general use in Australia, it does not make a lot of difference which you choose.
Compass Warning
Options [ON | OFF ]
Determines if the device will warn you about interference to the internal electronic compass.
Map Arrow
Options [Bearing | Compass]
Determines whether the position indicator rotates to show your current bearing, or compass direction.
From time to time your device may prompt you to perform a compass calibration. It is not the app which is requesting that you perform calibration, but rather the iOS operating system on the device itself which prompts for this task.
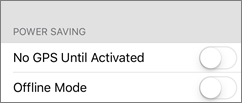
No GPS Until Activated
Options [ON | OFF]
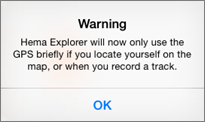
This option will suspend GPS tracking if you drag the map around, etc. until you tap the GPS Lock button. This can save a small amount of battery power.

If you switch this option on, you will receive a warning, as shown below:
Offline Mode
Options [ON | OFF]
When enabled, Offline Mode will prevent Hema Explorer from attempting to download content such as maps. It may be worth enabling this option if you are accessing the internet via a cellular (mobile phone) connection to avoid exceeding your data limit.
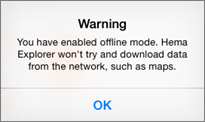
If you enable Offline mode, you will receive a warning, as shown below.
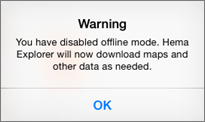
If you disable offline mode again, you will receive another warning.
Watch Display
Allows you to configure the data fields to display when the app is used in conjunction with the Apple Watch.
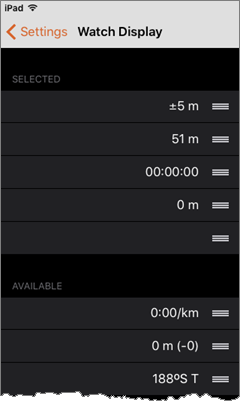
You can drag-and-drop the fields between the Available and Selected categories.
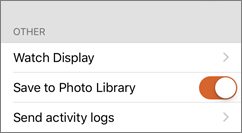
Save to Photo Library
Options [ON | OFF]
Determines whether images taken with the Hema Explorer app will be stored in the standard device Photo Library (Camera Roll on iOS).
If this is switched on, each time you take an image within the app, a DUPLICATE of the image is made in the device Camera Roll. These images are independent of one another. ie. you could delete the image stored on the Camera Roll without affecting the image stored for a waypoint within the app, and vice-versa.
Send activity logs
This option will send logs to our tech support team to enable them to diagnose issues with the app.
The logs will be sent as attachments to an email which will create a ticket in the Hema Tech Support system..
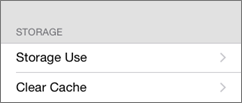
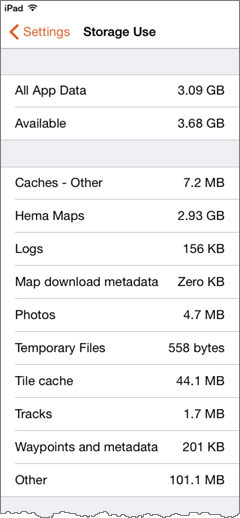
Storage Use
The Storage Use option will display some statistics related to the Hema Explorer app on your device. When you tap this option, there will be a short delay while the data is gathered / calculated. Example output shown below.
Clear Cache
Clearing the cache will remove the oldest 100,000 map tiles from the app cache freeing up some space.
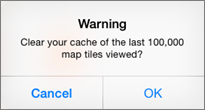
Tap the Cancel button if you change your mind.